by administrador | Jun 17, 2017 | Gestionar evaluados - Manage Evaluates
 Do you need to find an evaluated person and don’t remember the project? Do you want to know if you have already evaluated someone? Do you want to find people who have a certain DISC factor as the strongest?
In the Assessed General Panel, you will find all assessments of all projects and all types of evaluation. You will have different search filters to facilitate the administration of those evaluated.
You will also be able to generate Group Maps as well as compare candidates with DISC Target profiles with those evaluated from different projects

by administrador | Jun 17, 2017 | Gestionar evaluados - Manage Evaluates
Edit project options
When you have already created a project and want to change some of the options with which you created it, enter the project and you will see a bar that has a small arrow to the right that when you click it displays the project data
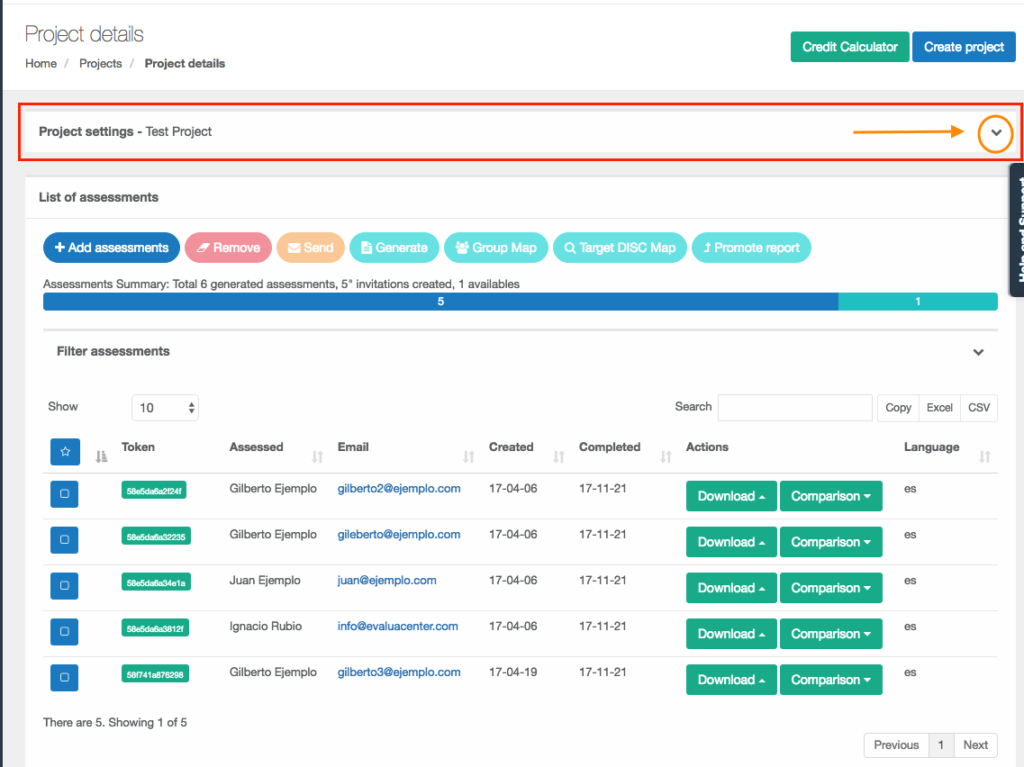
Once deployed you can click on the pencil icon to edit the project details. Among these details, you will see that the number of evaluations you originally assigned to this project can vary.
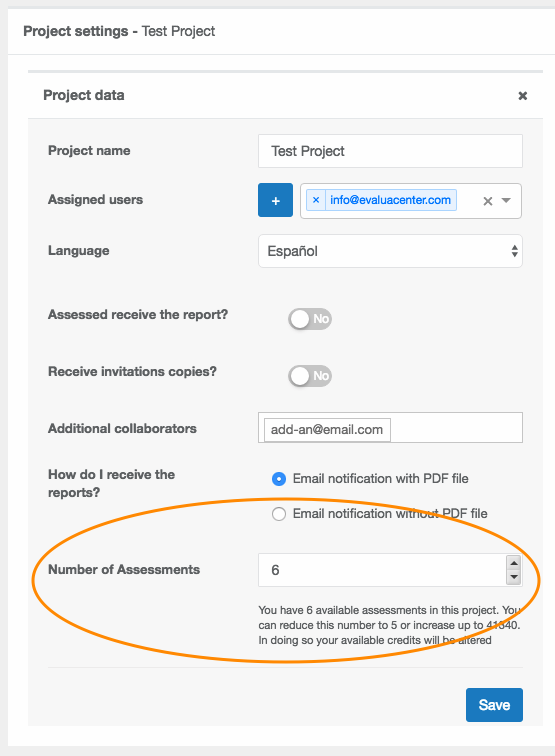
Edit the number of evaluations assigned to the project
You will see below an option called “Number of Assessments”. This option allows you to reduce or increase the number of evaluations assigned to your project. If, for example, you created the project for 6 evaluates, but only used 5 evaluations and you are not going to use the sixth one, you can recover those unused credits for your free credit account by decreasing the number of evaluations assigned to this project (if you had 6, you can put 5). In order to do this, that third evaluation cannot have an invitation created if it has one, mark it and delete it before modifying the assigned evaluations.
You can also increase the evaluations assigned to this project, just increase the number of evaluations (you need to have free credits for this option). The system will allocate the necessary credits to extend your project (if you do not have enough credits, acquire them first in the credit calculator).
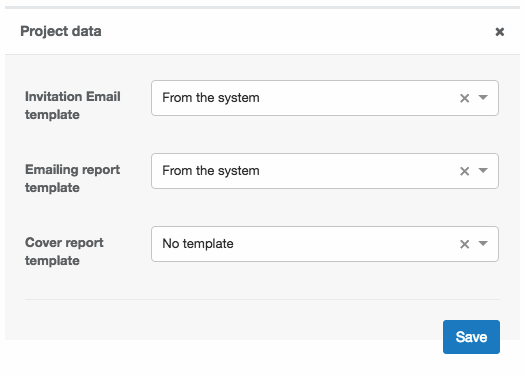
Project customization
You can change the customization of emails or cover of project reports by editing this section by clicking the pen icon next to the title.
by administrador | Jun 17, 2017 | Gestionar evaluados - Manage Evaluates
Team Map
You can generate a DISC group map (if you are in a DISC project). To do this select all the evaluates you want to group on a map (they must have a report generated) and click on “Group Map”. A dialog will open in which you can choose to download a group map with the natural DISC profile, adapted or both, choose one and press the green “Group Map” button, you will download a PDF document of 2 pages with the map of evaluated and a list with the names of each person.
If there are several names in a single quadrant and not all the initials fit, the map will put the number of people who are in that quadrant and in the list on the next page you will find grouped the names of people who are in that quadrant.

You can also compare evaluates of different projects through the “Assessed General Panel”
Filtering Evaluations
In DISC projects, the “Filter evaluations” section is folded under the bar that indicates your project data. As in the case of the “Project Options” you will see a small arrow on the right, press to display it.
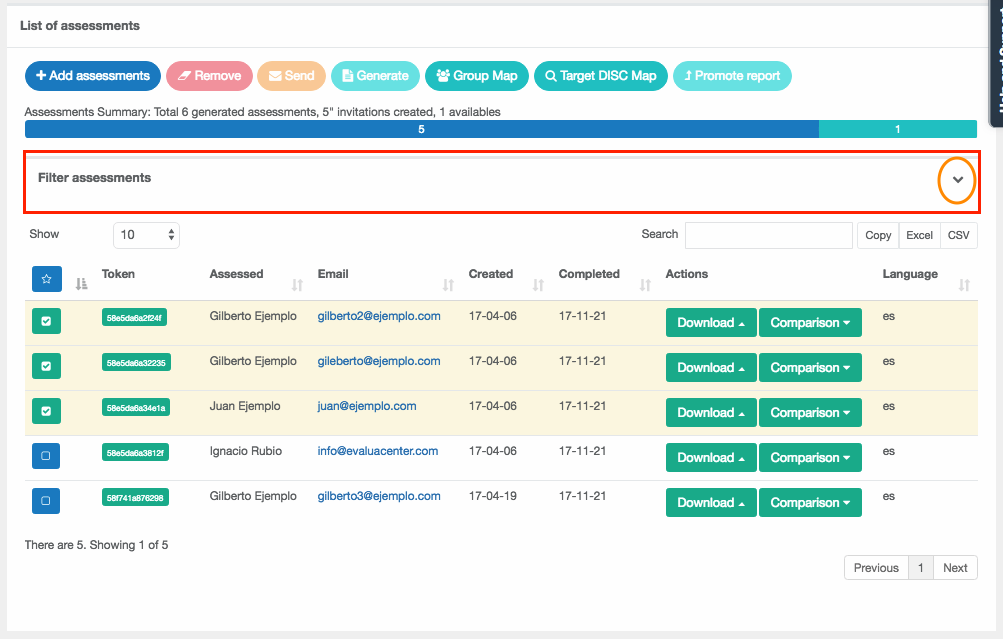
It will open a dialog in which you can choose a DISC factor and do a search of all those evaluated whose first DISC factor is the one you chose.

by administrador | Jun 17, 2017 | Gestionar evaluados - Manage Evaluates
Delete invitations that you are not going to use
You can delete invitations that have not been used (you cannot delete reports that have already been generated). Simply select the invitation by marking its blue button on the left, and press the red “Delete” button
This will “free” credits within the same project to create a new invitation in this project

Resend invitations
Mark any invitation or invitations created and with the “Send” button the access email to the test will be sent again to the person being evaluated
Sending Access to the Test Manually
You can copy the link to the test and paste it into an email to send it from your own email. To do this simply click on the token button of that invitation and it will be automatically copied to your clipboard, paste it into your email to send it

by administrador | Jun 17, 2017 | Gestionar evaluados - Manage Evaluates
Once you have accessed your project you will see the Project Management screen, similar to this
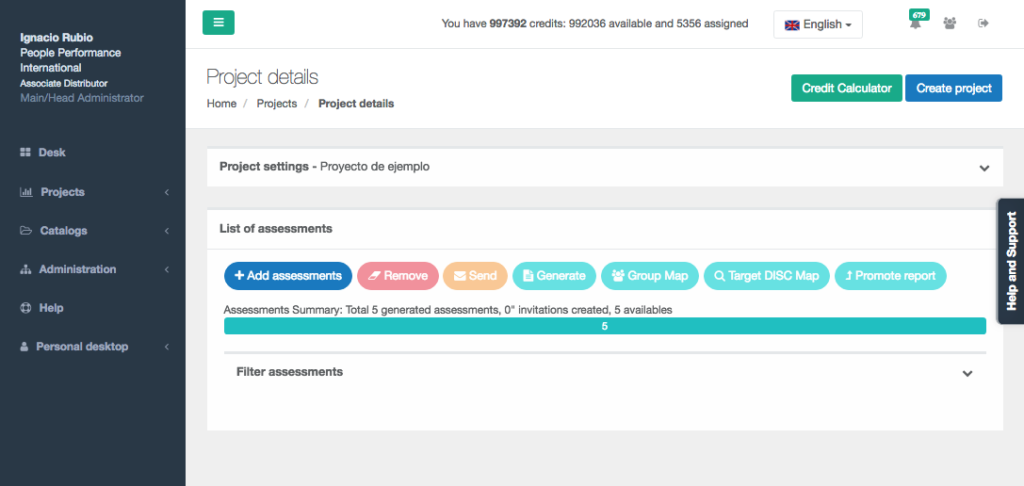
To create a new invitation for an evaluated, press the “Add assessment” button and a window will open to add the evaluations.

Enter the emails of the people to be evaluated, you can write them one by one, or paste them separated by space, comma or even rows. You can choose the language in which they will receive the invitation and take the test (the person being evaluated can change the language of the test before taking it). Choose if you want to automatically send the email with the link to access your test, you can also decide to send invitations at another time.
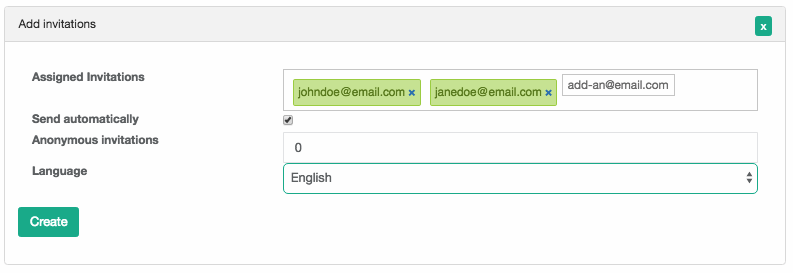
You can also create anonymous invitations without linking them to a specific respondent and manually email the link to anyone by pressing the “Token” button that will copy the link to your clipboard so you can paste it into your own email. To create anonymous links without email simply enter the number of invitations you want to create.

In case of Open or Cross Radar projects you will be opened a special dialog to add assessments, please refer to the section in this tutorial of “Creating a 360º Competence Radar step by step”


