by administrador | Jun 17, 2017 | Crear Proyectos - Create Projects
Choose the type of evaluation and modules for your project

Type of assessment
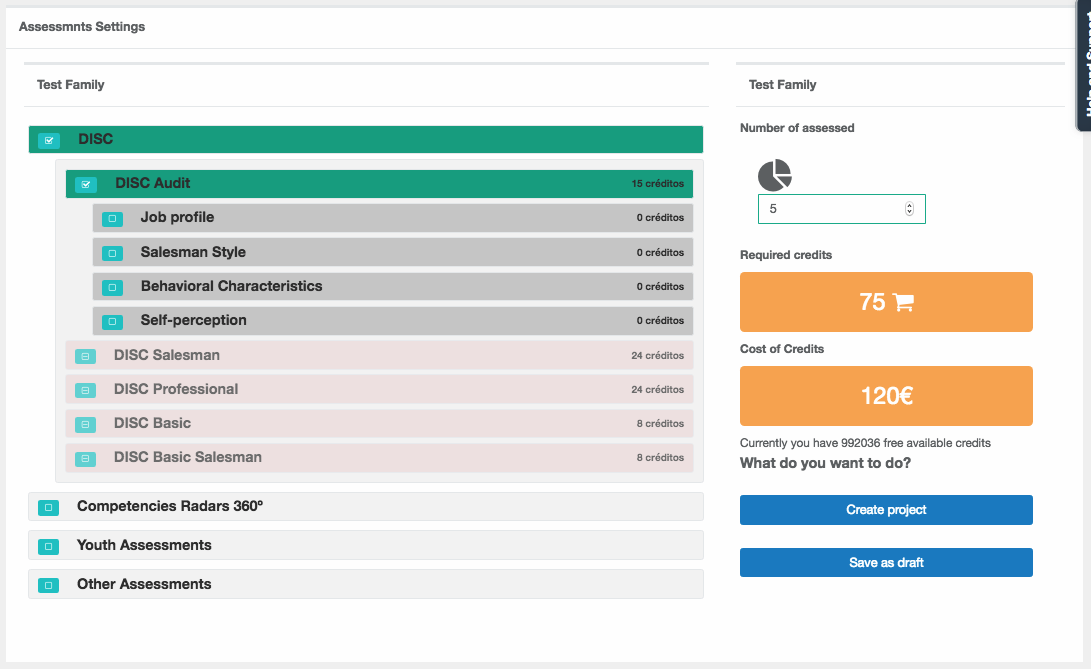
Choose the family of assessments you want to apply, this will open up the available assessments. Choose the specific assessment, this will open the available modules (if any). Choose the modules you want to include, if you only want the base report, do not choose any module. Note that there are modules that are not compatible with each other, if you choose a module with incompatibilities, the system will color the incompatible modules and you will not be able to add those. To deselect a module, report or family, simply click on it again.
Project cost
 First write the number of people to be assessed (not observers, in case of competency radars, only the people being assessed)
Below you can see the cost of the project, the necessary credits and the cost in your currency (without tax). If you have enough credits available in your account, you can create the project and the system will assign these credits to you (you will take them out of the available credits and transfer them to assigned credits). If you do not have credits or do not have enough, the system will tell you the additional credits you need to acquire for this project and will give you several options:
- Acquire lacking credits and create the project.
- Save the project as a draft. This is done when you are not ready to purchase credits at that time but will do so later or when you want to purchase a large package of credits to benefit from discounts (through the credit calculator) and activate the project using some of those credits from your purchased package. In this case, your project will be drafted in your project list and you will be able to enter again later from the list options and complete it to activate it.
If you are not interested in creating this project, simply get out of it.
Once the project has been created, you will have direct access to it and will be able to manage your evaluations.
In the case of Radars, you will go to a “Radar Settings” window that you will see in the tutorial “Create a 360º competency radar step by step”.
by administrador | Jun 17, 2017 | Crear Proyectos - Create Projects
In this section, you can customize emails and report front cover page

Invitation Email
You can use the standard invitation email of the system that is sent to the test taker with the access to the test, you can use a personalized email that you have already created or have used on another occasion, or you can create a new email with the text that you want. The system will automatically embed the test link at the bottom of your personalized email. If you create a new email, give it a unique and recognizable name, as the system will create a template with that personalized email that you can choose in other projects as well. In the “Project customization” menu you can manage all your templates.
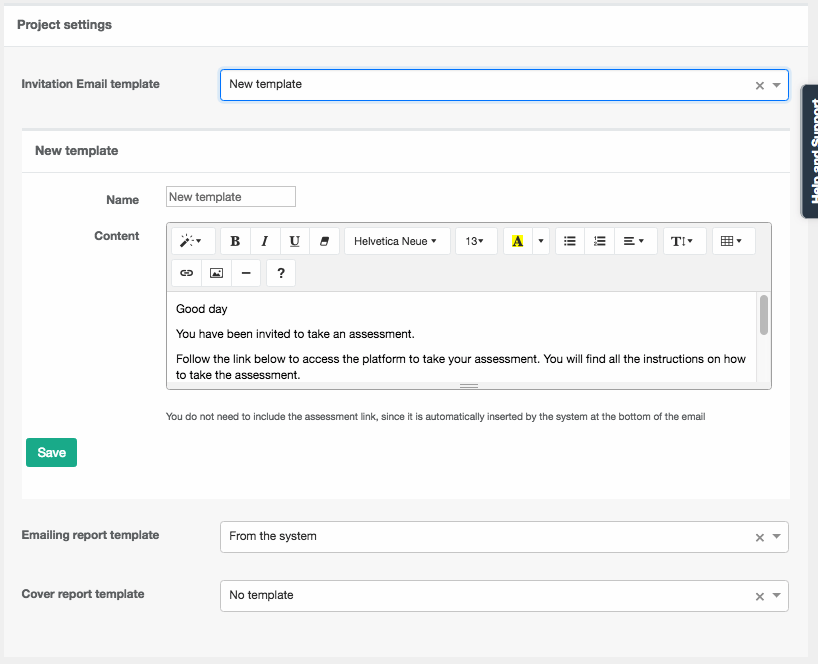
If you choose a template or create a new one and change your mind at the moment, just click on the small “x” next to the template name to choose another option.
Email to send the report
As in the previous case, you can customize the email the person being evaluated receives with a copy of his or her report (if you chose to have the people being evaluated receive a copy of the reports). All the above mentioned for the invitation email applies to the email to send the report.
Front cover template
In this section, you can customize what you want to appear on the cover of your report. Like the previous case, you can choose not to have the cover page showing your data, to show information you created previously, or to create a new custom template different from the ones you already have. Enter a recognizable and unique name for each template.
by administrador | Jun 17, 2017 | Crear Proyectos - Create Projects
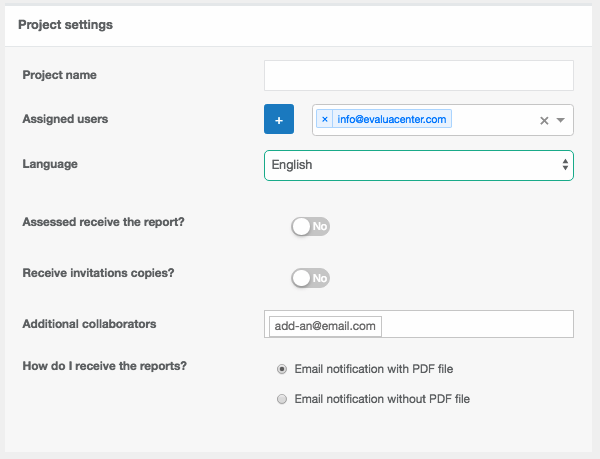
In the first section, we configure the options of the project
Project name
Put a recognizable name for yourself, because if you have several projects, it will be easier for you to identify the one you want to manage from the list of projects.
Assigned users
These are the users who manage the project, by default the main user is the project creator. You can select or add other users to manage the project depending on the type of user (administrators, managers, controllers), you will better understand the types of users in the section “Users”.
Language
This is the default language of the project. Note that although a project has a default language, within the project you can create invitations or download reports in other languages as well.
Assessed receive the report?
Tick here if you want the respondents to receive the generated report in PDF or not to receive it (e.g. for recruitment).
Receive copy of invitations?
If you wish to receive an email copy of all the invitations that are sent by the system with the access to each test, check this option. Sometimes this is used to be able to make a resend of the invitation email from your own mail system when the person being evaluated says they have not received it, however, at the same time you can get too many unnecessary emails, as you will always have the option to resend the invitation again from the project or send the link manually.
Additional Collaborators
Do you need someone (other than you or a user) to receive the same notifications or copies of reports (if you have checked that you wish to receive a copy) that you receive? This option allows you to enter one or more emails from other people (not those evaluated) who want to receive a copy of the notifications or reports, for example, the manager of those evaluated or the HR manager of the company.
Ho do I receive the reports?
You can choose whether you wish to receive by email a copy of each report generated or whether you wish to receive only notifications that an evaluation has been completed (without containing the pdf of the report, although it will always contain the link to download it). Of course, you can always download the PDFs from the Project Management section.
by administrador | Jun 17, 2017 | Crear Proyectos - Create Projects
Click the create project button on your desk or in the “Projects / Create Project” menu

The project creation consists of 3 parts:
- Project Settings (options)
- Project Settings (customization)
- Assessments settings